
Edit articles or education (blogs) after a CSV bulk upload
min read
After uploading articles in bulk, extra steps are required to add images and reformat text to ensure content is structured well and they look great.
Before you start
Bulk uploads are handled by Group Digital using an CSV export containing all the html content for the article. Please confirm with Group Digital that the bulk upload has been completed successfully before editing anything.
Access: Drupal site editor account required
Step 1 - Locate the articles in the Content section of Drupal
Articles are created as either Article or Education content types.
Sometimes both types will be used if the website needs 2 different types of articles for example a "Blog" and "Recipes"
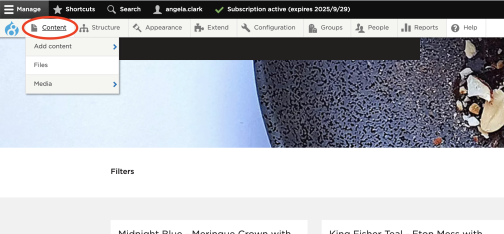
- Go to Content section of Drupal
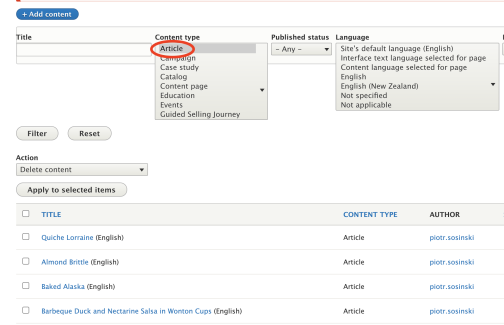
- Click "Article" or "Education" under the Content Type filter list
- You will see a list of all articles
Step 2 - Edit article's content
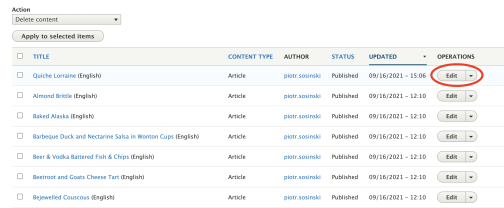
- Click "Edit" next to the article
- Review all fields and make any necessary changes
After a bulk upload we recommend the following changes:
- Tick/add all relevant categories, to enable users to filter articles by topic
- Change "Date" to reflect original publish date
- Upload a relevant header image
- 1920 x 537px (more detail in Image Handing Guidelines)
- Write a concise lead sentence that summarises what the user will learn by reading the article (200 characters or less)
- This is used for the article thumbnail description on the parent landing page
- By default, it's also used as the page meta description, visible on search engine results pages
- Reformat content under paragraphs to tidy it up, including:
- Adding headings (using styles Heading 2-5 from the dropdown) to break up text and make the article easier to skim
- Adding bullet/numbered lists to make text easier to read
- Adding in-line links to other parts of the website to help users learn more or browse products
- Add a popularity weight to determine how articles are ordered when the user sorts by popularity
Step 3 - Add in-line images to the body of the article
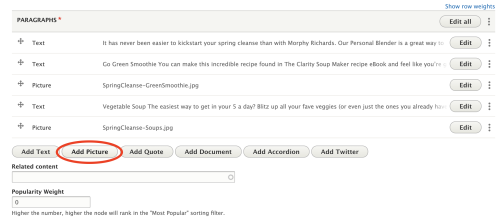
- Click "Add picture" under paragraphs
- Upload an image from your computer (or select an image already uploaded to the Drupal media library)
- Ensure either alt text or an image caption is included, to describe the image
Step 4 - Update URL alias to group article under the parent article page
- Click "URL ALIAS" from the right hand-side panel
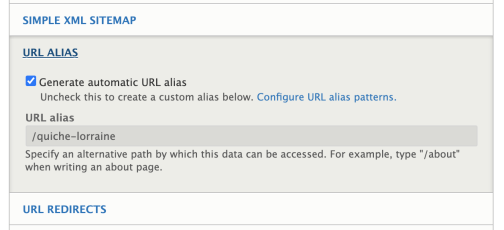
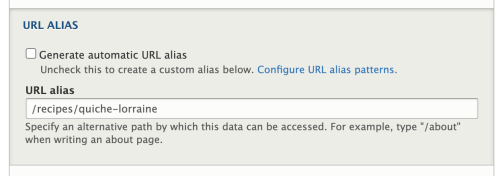
- Untick "Generate automatic URL alias"
- Add "/blog" or "/recipes" (depending on what the parent page's node title is) to the beginning of the existing URL alias
Step 5 - Save and review article
- Ensure published checkbox at the bottom of the page is ticked
- Click "Save"

You'll be taken to the article afterwards to review how it looks, but we recommend reviewing it in incognito mode to get a more accurate preview.
When reviewing the article, make sure to check:
- How it looks on mobile
- That breadcrumbs at the top include the parent page (usually "Blog" or "Recipes")
- How the banner looks when cropped in different breakpoints + on the article listing section of the parent page
Step 6 - Make any adjustments for a different region site (optional)
By default, the article will also appear on any other region's sites.
To only show the article for certain regions:
- Edit the article
- Click "Region Settings" from the right hand-side panel
- Tick the regions it should only appear on
- Click "Save"

To create a translation (for slight regional differences or a different language):
- Edit the article
- Click "Translate" from the tabs at the top of the page
- Here you'll see if any translations already exist
- Click "Add" next to the region you need a different version for
- You'll be taken to a new Edit page where you can make the necessary edits to this region's version
- Click "Save (this translation)"
- Note: Due to a bug, you'll be taken back to the original version of the article, NOT the translation you just created.
To review the translated version, either:
- Go to other region's website using the country dropdown or direct URL
- Navigate to the article's parent page (usually "Blogs" or "Recipes")
- Click the article from the list
or
- Go to Content
- Filter by Content Type "Article" or "Education"
- You'll see the Translation Language in brackets after the article title, and also in the Translation Language column
- Click the title of the translated article
- This will take you to the translated article
