Creating icon based menus
From the dashboard menu, go to Structure > Block Layout > Custom Block Library
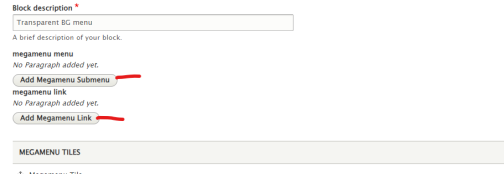
Add a new component Mega Menu 2

On the right of the screen, use the Remove button to remove the Megamenu Menu and the Megamenu Link leaving you with only the Megamenu tiles section.
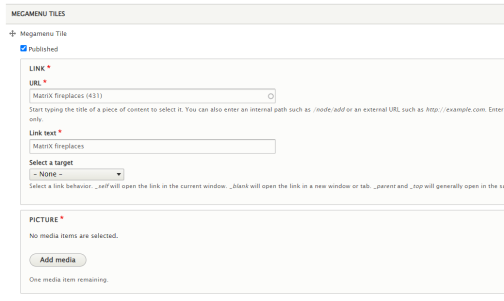
For each link, enter the destination URL using the auto suggest, or paste in the external URL if the link is outside the website.
Add the desired link text
Select a target, leave alone if the link is internal to the website, or if going to an outside website, choose new window

For picture, click on Add Media
Navigate to the desired image in the media library (either .svg, .png, or jpg), or upload your image of choice in the usual way.
Add an alternative text representation to the image to facilitate both accessibility and SEO.
When complete, click on Add Megamenu Tile to continue to add additional icons and links to the menu.
Icons can be toggled on and off using Published checkbox above each tile.
When complete, click save at the bottom of the screen
Adding the megamenu to the main navigation.
Go to Structure > Main Menus > Main Navigation
If the Top navigation has a submenu, each page in that sub menu will need to be disabled, so it will not conflict with icon menu when assigned

Next go to Structure > Block Layout and scroll to the bottom of the screen until you see the options for Ultimenu:main:
The ultmenu:main: sections show which parts of the menu are able to accept an icon menu. If you do not see the section you want shown here, please contact the digital team and we will enable it
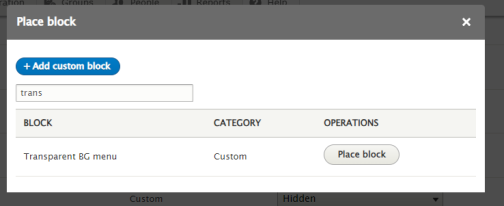
Click on the button that says Place Block

Type the name of the menu you created into the search bar to find it.
Uncheck the display title checkbox
If the menu is region specific, click on regions and using the checkboxes choose which regions the menu is applicable to
Click save block
Click save blocks to save the changes made to the block layout screen